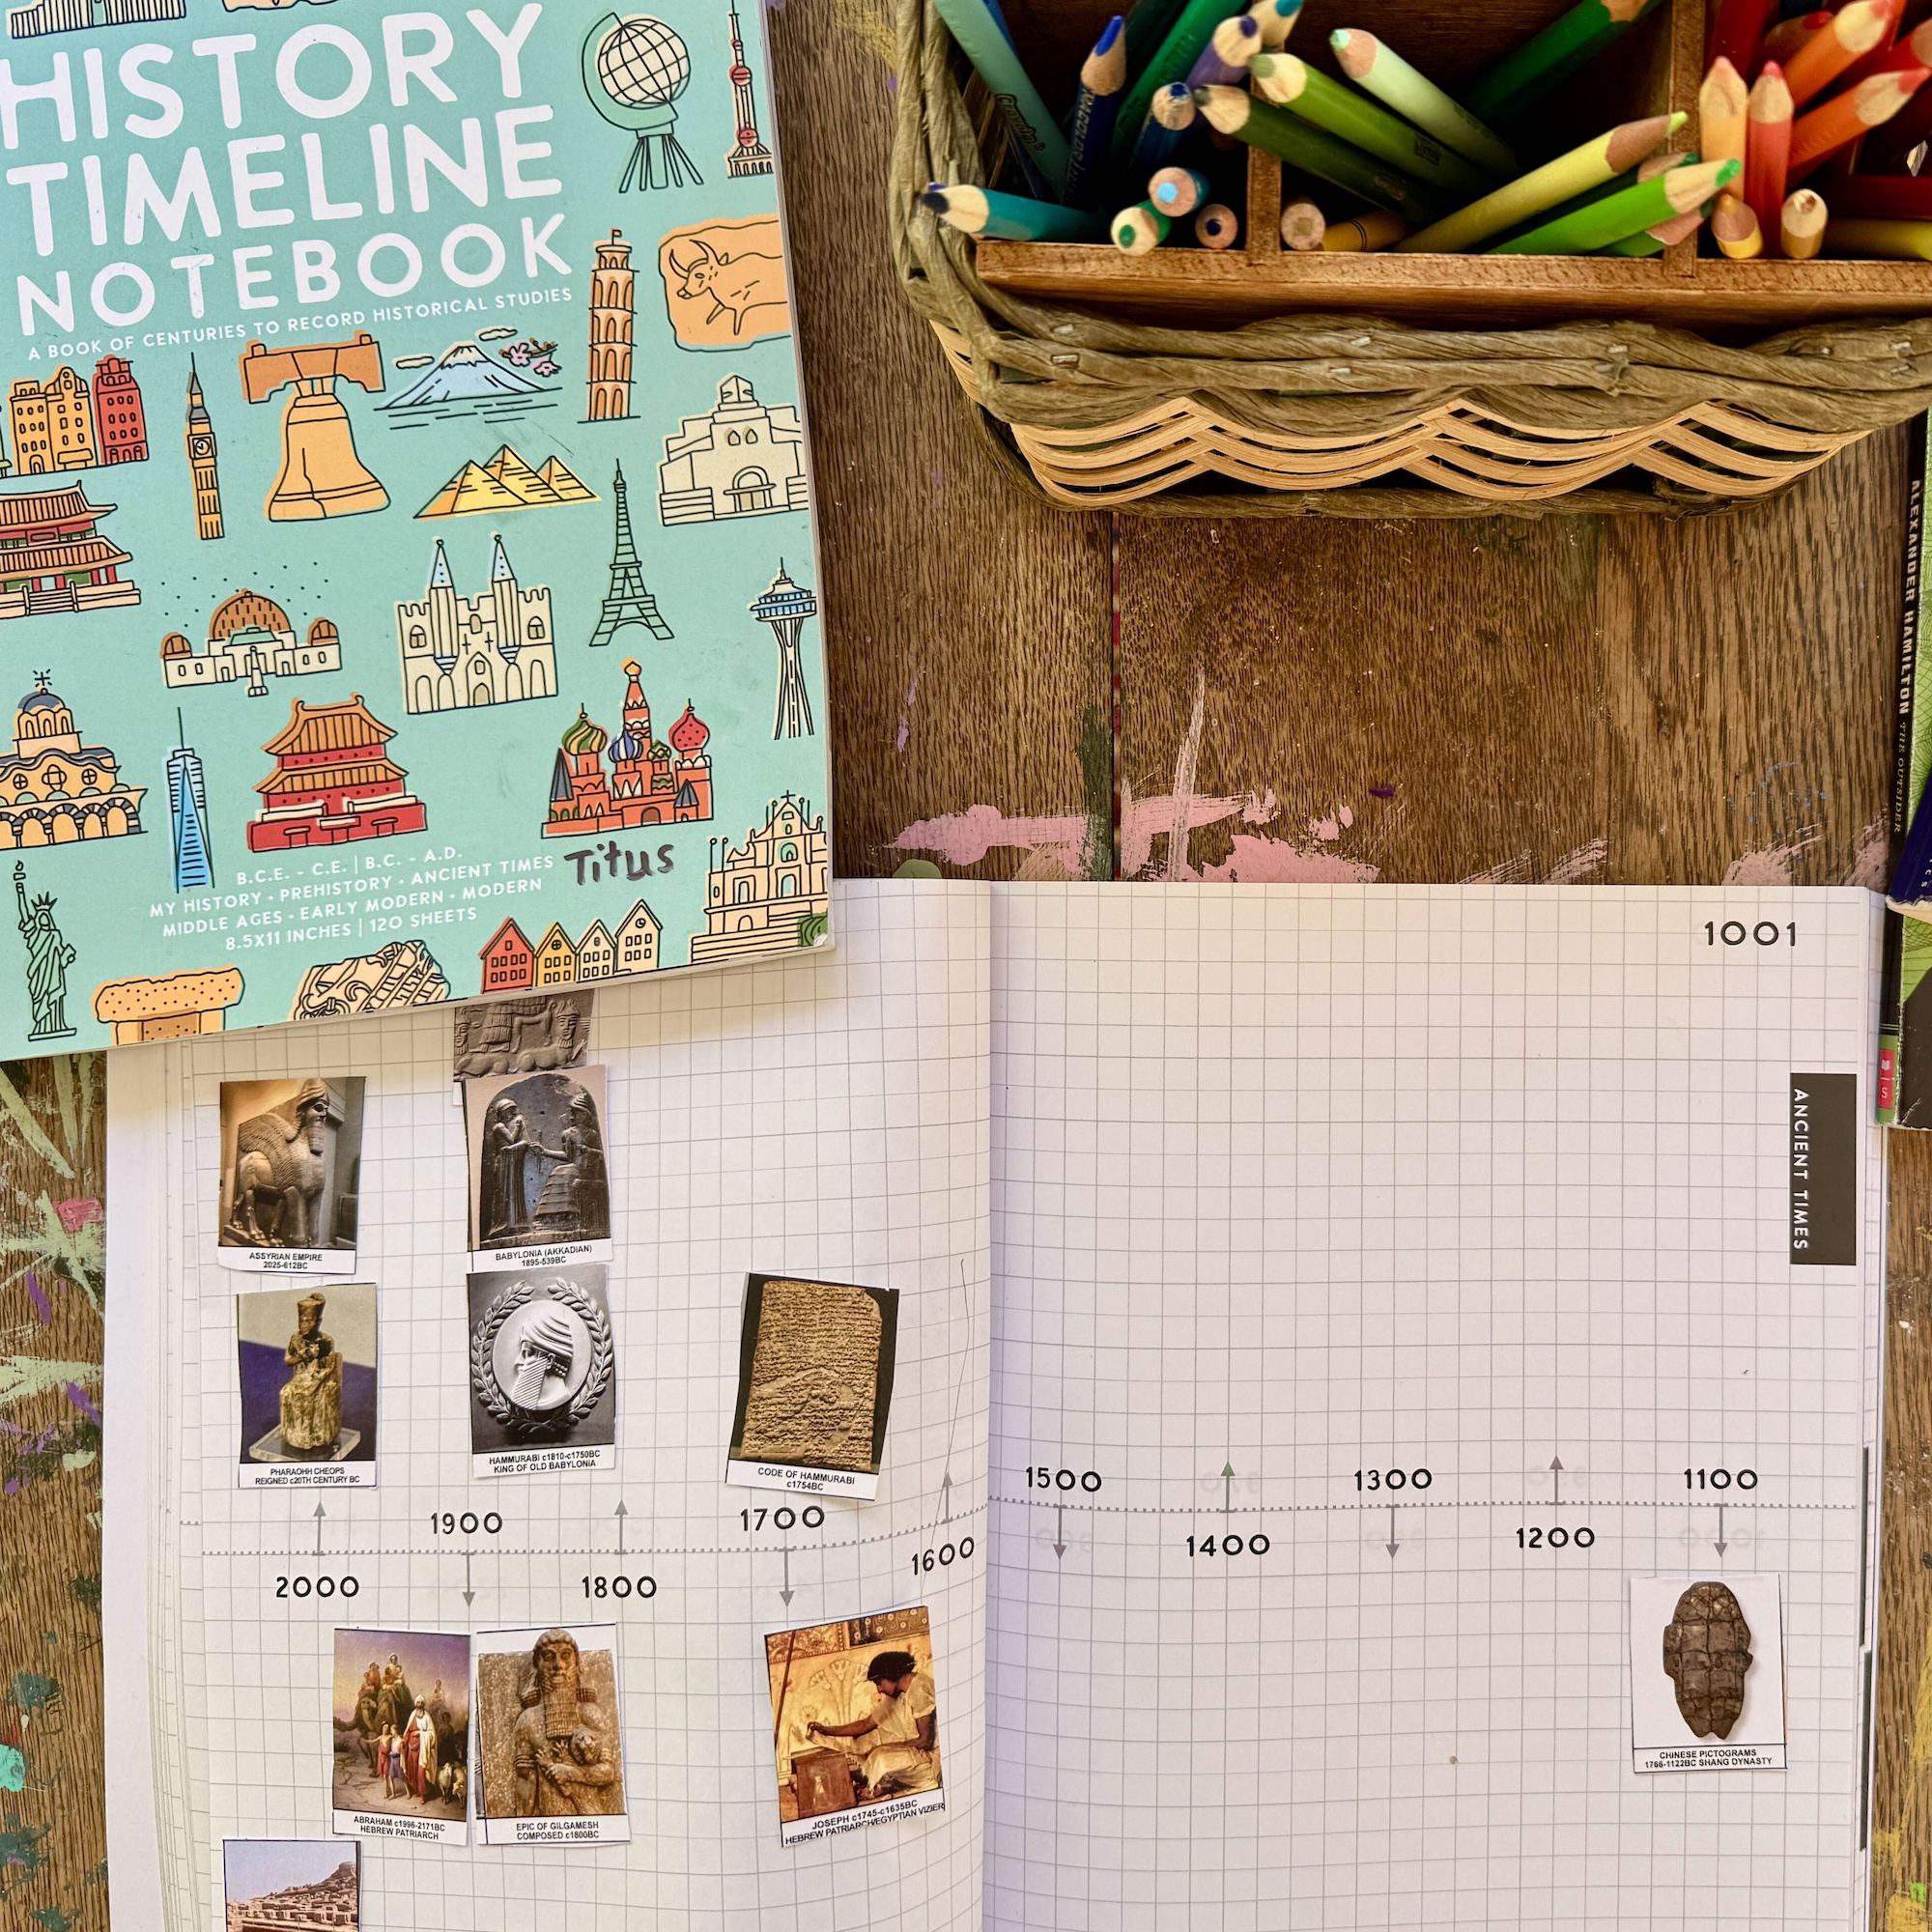
At our homeschool table this year, I have a first grader, a third grader, a sixth grader, and an eighth grader. Some curriculum we do separately, of course, but much of our homeschool still happens together. We may all listen to the same read-aloud, study the same period in history, go on a nature walk to look for signs of a changing season, or gather around one Bible story or passage. What each child does with that lesson afterward can look completely different.
Notebooking is a practice that makes this possible. Notebooking gives us a way to share the same lesson without expecting four children in four different stages to process it the same way and produce the same work. My youngest may fill her page with a large drawing and dictate one sentence to me. My oldest may write several paragraphs, add a map, or organize what he learned into a detailed diagram. They are learning together, but each one is doing the work that fits them.
I have used notebooking in our homeschool for many years, and it has grown right along with my children. We do not use it for every lesson or even every subject, but it is one of my favorite tools we return to again and again when I want my children to pause, reflect on what they are learning, gather their thoughts, and create something beautiful that marks that moment in their education. In this blog post I am sharing all about how we do notebooking in our homeschool, including how we do notebooking with multiple children and frequently asked questions.
In this blog post:
- What notebooking means in our homeschool
- How we use notebooking across subjects in our homeschool
- What topics does a child notebook about?
- How I adapt notebooking for different ages
- What we keep in our notebooking basket
- How we store our notebooking pages
- Our simple notebooking rhythm
- How often do we notebook?
- More frequently asked questions about notebooking
- How to begin notebooking in your homeschool
What notebooking means in our homeschool
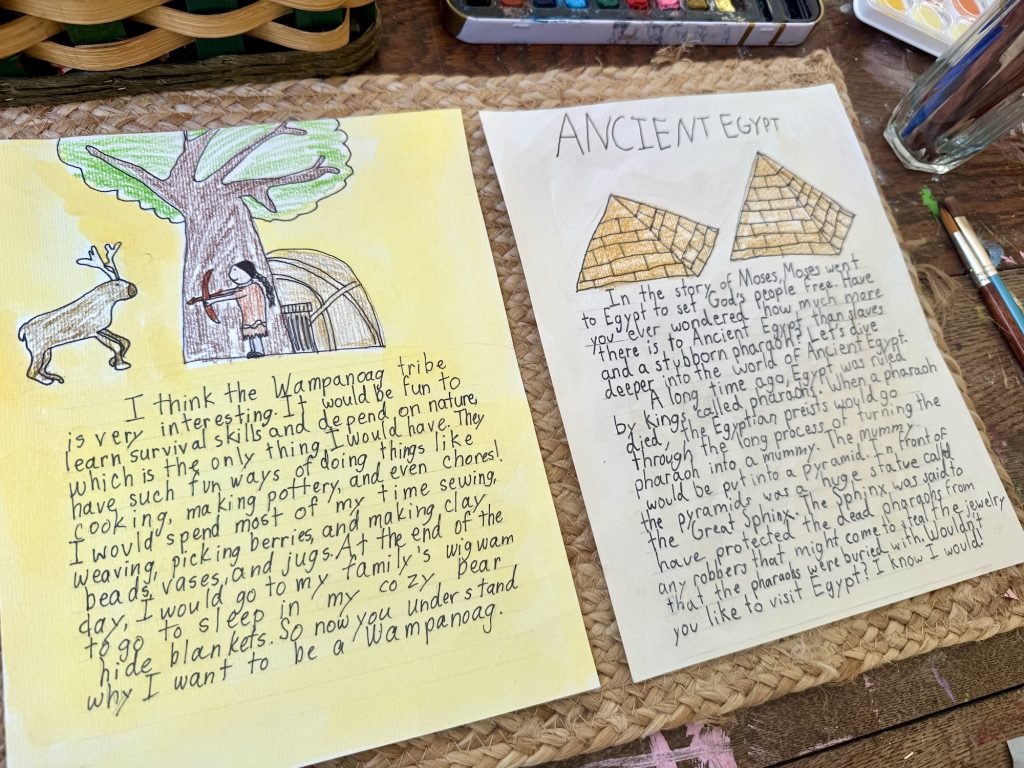
When people first hear the word notebooking, they sometimes picture a beautifully illustrated page with perfect handwriting and carefully placed watercolor details. A notebook page can certainly be beautiful, but that is not what makes it notebooking.
For us, notebooking begins with a simple question: What stood out to you and do you want to remember?
The answer can take many forms. A notebook page might include:
- A title and date, which gives the page context and makes it easier to revisit later.
- Narration, which could mean a sentence dictated to me, a few copied lines, or a longer written retelling in the child’s own words.
- Artwork, such as a sketch, watercolor painting, traced image, nature drawing, or illustration of a favorite scene.
- Information, like labels, definitions, questions, interesting facts, or a short list of details the child wants to remember.
- Visual connections, like a diagram, map, chart, timeline, or another way of showing how ideas fit together.
- Meaningful words, including a Bible verse, line of poetry, quotation, or sentence copied from a living book
The purpose of a notebooking page is not to prove that a child remembers every detail from a lesson. The practice of notebooking gives children room to focus more deeply on one aspect of a lesson. It permits children to choose what stood out to them, put it into their own words, and make connections that might not appear on a worksheet. Some pages are mostly writing, some are mostly art, but many are a combination of both. In many ways, notebooking is comprehension made visible. When I look at a finished page, I see what my child noticed and what sparked their interest.
How we use notebooking across subjects in our homeschool
Notebooking is not its own subject in our homeschool. It is a practice we carry from one subject to another, which is part of why it has remained useful through so many seasons. The materials stay mostly the same, but the pages change depending on what we are studying.
Notebooking from Bible passages and poems

During Bible lessons, one child may illustrate the passage while another copies a verse, writes what it teaches about God’s character, or journals a prayer. The page becomes a place to respond instead of simply moving on to the next lesson. This practice also pairs with some aspects of the Bible lessons in Rooted Family Bible Curriculum, A Connected Christmas, and other holiday studies.
We use notebooking with poetry in much the same way. A child might copy the full poem or a line that created the clearest picture in their mind. Then they may paint the scene they imagined or write a few thoughts about the poem. I love that this allows children to spend time with a poem without picking it apart until the beauty is gone.
Notebooking from history, biographies, and geography

History pages often grow out of the stories we read together. My children may sketch a historical figure, add an important date to a timeline, draw an object from the time period, or write about the part of the story they found most compelling. When we read a biography, I may ask what they learned from the person’s choices rather than simply requesting a list of facts.
Geography naturally finds its way onto these pages too. We trace or draw maps, mark journeys, add landmarks, and record details about the landscape, animals, food, or daily life of a place.
Notebooking from science and nature study
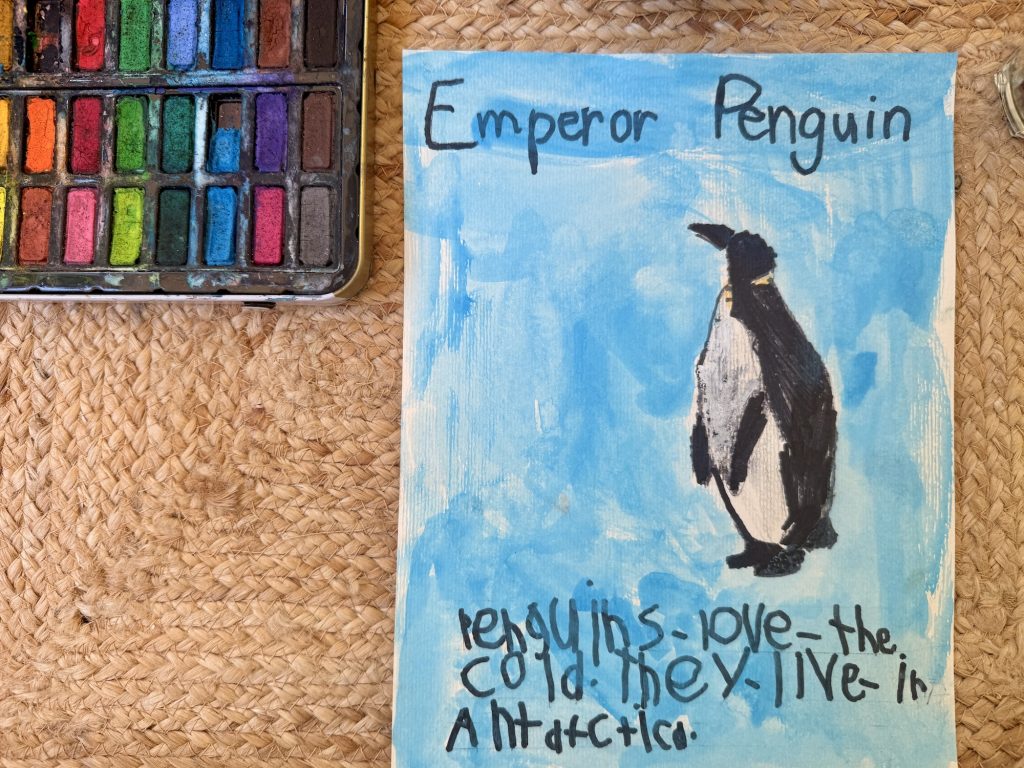
Nature study is where notebooking feels most alive in our home. A page may begin with muddy shoes, a mushroom beside the trail, a jar holding an insect for a closer look, or a pile of shells spread across the table. We sketch first, then pull out field guides, compare details, add names and labels, and write down the new questions that surface.
Over the years, my children have made pages about pond life, birds, storms, trees, reptiles, the night sky, seeds, wildflowers, and seashells. Sometimes we finish the page in one sitting. Other times it stays open for several days as the children notice something else or find another fact they want to add. That slower process is one of the things I love most about it. Notebooking invites us to linger.
Notebooking from living books, trips, and interests
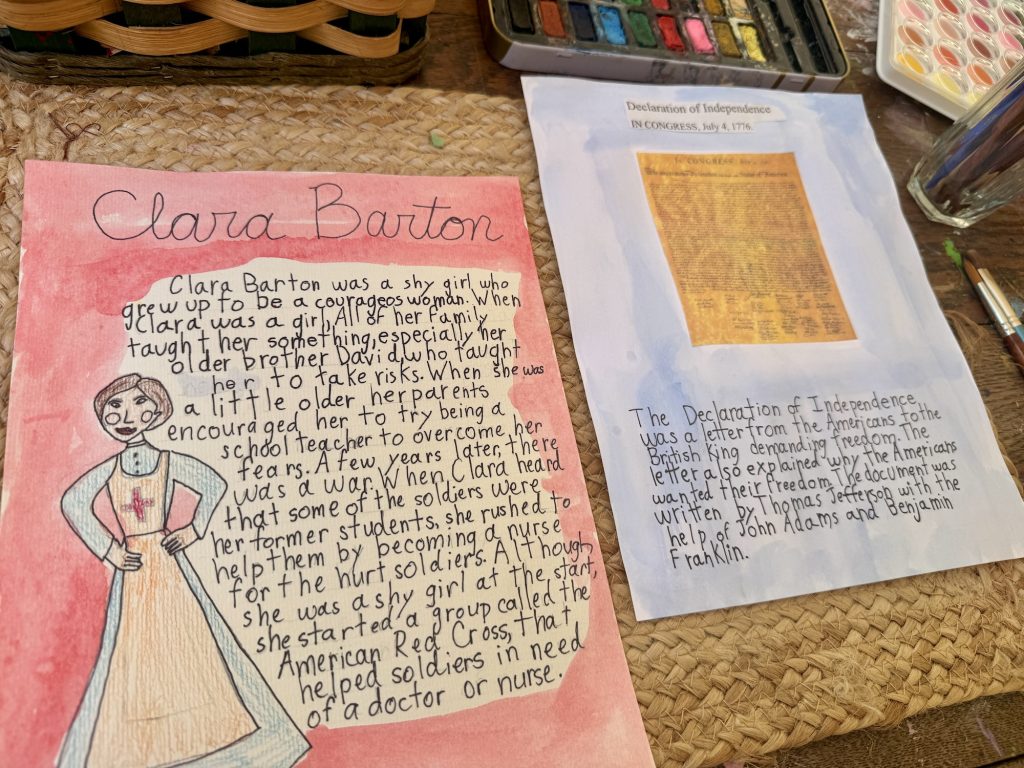
We also notebook from read-alouds, biographies, and books my children are reading independently. I do not ask for a page after every chapter. I am more likely to use one at the end of a book, after an especially meaningful scene, or when a child cannot stop talking about something they discovered. Sometimes we notebook about an author, the historical time period a book was written in, or an animal featured in the story.
Some of our best pages were never part of my plan. They began after a museum visit, a family trip, an afternoon at the pond, or a question asked in the middle of breakfast. Notebooking gives those interests somewhere to go. A passing curiosity can become a sketch, then researching deeper through books or the internet and then a page of documenting their findings.
What subjects and skills does notebooking cover?

Notebooking can cover far more than the topic featured on the page. While a child may be creating a page about ancient Egypt, birds, or a Bible passage, they are also practicing many other academic skills at the same time.
Depending on the child’s age and the page they are creating, notebooking may include:
- Handwriting and copywork
- Spelling, punctuation, and grammar
- Oral and written narration
- Reading comprehension
- Summarizing and organizing information
- Paragraph formation and composition
- Research and notetaking
- Vocabulary and definitions
- Mapping, timelines, charts, and diagrams
- Drawing, painting, and careful observation
- Planning, editing, and creating a final draft
For my younger children, one page may combine oral narration, handwriting practice, and drawing. An older child may research a topic, organize notes, write and edit several paragraphs, type a final draft, and create a detailed illustration or map.
This is one of the reasons notebooking is so valuable in our homeschool: It allows us to practice language arts, research, creativity, and subject knowledge through one meaningful piece of work rather than separating every skill into a different worksheet or lesson book.
What topics does a child notebook about?

A notebooking page does not need to summarize an entire lesson or topic. I usually encourage my children to choose one part that interests them and explore it more deeply. Here are a few examples:
- While studying ancient Egypt, a child might draw and label a pyramid, explain the mummification process, copy a few hieroglyphics, map the Nile River, research a particular pharaoh, or illustrate daily life in an Egyptian village.
- While studying birds, a child might draw a species they observed, label the parts of a feather, compare two types of nests, map a bird’s migration route, or explain how a bird’s beak is suited to its diet.
- While studying the American Revolution, a child might create a timeline, illustrate an important event, write about the life of a historical figure, or explain one cause of the war.
- While studying a country, a child might draw its flag, create a map, illustrate a traditional meal, research an important landmark, or write about the landscape, wildlife, and daily life of its people.
- While reading a biography, a child might draw a portrait, record important dates, explain a challenge the person overcame, or write about something they learned from the person’s choices.
- While studying the human body, a child might draw and label an organ system, explain how the heart pumps blood, trace the path food takes through the digestive system, or research how the body heals a broken bone.
- After a nature walk, a child might sketch a mushroom, leaf, flower, shell, or insect; identify it with a field guide; label its parts; and record where and when it was found.
- After a field trip, a child might draw something memorable, attach a ticket or photograph, write about what was learned, or research a question that came up during the visit.
The possibilities are nearly endless. Notebooking can grow from almost anything we are learning together, and two children can study the same topic while creating completely different pages.
How I adapt notebooking for different ages

Because my children have used notebooking from the preschool years into middle school, I have watched the pages change as their skills grow. I think less about assigning one correct kind of page and more about deciding what support each child needs. The subject may be shared, but the expectation should not be.
Preschool
In the preschool years, notebooking is mostly about drawing. Preschoolers love to make pictures of what they are learning. They may copy a few words about what they drew, but I do not worry about handwriting at this age. If they tell me something interesting about the subject, I may write their words on the page for them. Other times they may glue or tape things on a notebook page that relate to the subject, like a leaf from a nature walk or a cut out picture we printed.
Kindergarten–1st grade
During the early elementary years, I encourage my child to tell me a few sentences about what they learned. I may write those sentences directly on the page or write them on a separate paper for the child to copy. When handwriting support is needed, I lightly draw primary lines on the notebook page using a lined stencil. For the illustration, the child may draw independently, trace a simple picture, or follow an easy online drawing tutorial. I still care much more about the ideas than the amount of writing.
2nd–3rd grade
Around second and third grade, I begin asking for a few written sentences on the notebook page. I may still help the child form those sentences and write them on another paper to copy. We also begin moving from primary handwriting lines to narrower lines. My children usually write in pencil first and then trace over their finished words with a felt-tip pen. This gives the page a more polished look and gives them a second opportunity to practice handwriting. Their illustrations may be original, based on a picture in one of our books, or created with another reference nearby.
4th–5th grade
By fourth and fifth grade, my children are usually writing one or two paragraphs on separate paper before placing the final copy on the notebook page. We edit the draft together, then they write the final version in pencil and go over it with a felt-tip pen. At this point, I expect the final page to show excellent handwriting, grammar, and spelling. They may create their own illustration or carefully reproduce one from a book or other reference.
6th grade and up
From sixth grade on, the written portion often grows to three or four paragraphs. My older children draft on separate paper, edit with me, and then rewrite or type the final version. Sometimes the work becomes a two-page spread so there is enough room for both the writing and a thoughtful illustration.
I expect excellent handwriting, grammar, and spelling on the final draft, along with deeper thinking, not simply more words. An older student may compare ideas, explain why an event mattered, or connect the lesson to something studied earlier. Illustrations may be original or carefully based on a book or reference.
These are not rigid grade-level rules, but a progression of the method I use as children grow. Children develop at different rates, and even the same child may need different support from one day to the next. The goal is to offer enough challenge for growth without asking so much that the page becomes a battle.
One lesson across multiple grade levels
If we study birds of prey together, all four children may listen to the same books and discussion, but their pages will not look alike. My first grader may draw an owl, label its wings and talons, and dictate one sentence. My third grader may copy two or three facts and add a picture of its habitat. My sixth grader may write a narration, include a labeled diagram showing how the bird is designed to hunt, and look through a field guide for a few additional details. My eighth grader may take the topic further through independent research, comparing two species, marking their ranges on a map, and explaining how their features help them survive.
As my children get older, I expect them to take more ownership of the process. Instead of relying only on the lesson we shared, they begin following their own questions, gathering information from books and other trusted sources, and deciding which details are most important to include. The shared lesson brings us together, while the different expectations and increasing independence allow each child to grow.
What we keep in our notebooking basket

I keep our most-used supplies together so notebooking does not require a scavenger hunt every time we sit down. We can bring the basket to the school table or carry a few things outside, and everyone has what they need within reach.
- Paper: We use loose 8.5 x 11 watercolor paper for our pages. We sometimes will also use tracing paper for maps or detailed drawings and add those to the page.
- Drawing and writing tools: Ticonderoga pencils, line stencils, ultra-fine Sharpies, and the nicer colored pencils we reserve for notebook pages.
- Painting supplies: Watercolor sets, paintbrushes, and a small jar or cup for water.
- Cutting and attaching: Scissors, tape, and glue for adding maps, printed images, pressed flowers, or a typed piece of writing.
- Sources for inspiration: Field guides, reference books, atlases, living books on the topic we’re studying, and books filled with beautiful illustrations the children can observe closely.
- For taking school on the go: Clipboards and pencil cases, filled with the essentials they need to work independently almost anywhere.
Illustration inspiration
- Art Hub For Kids (YouTube)
- Watercolor in Nature by Rosalie Haizlett
- Draw Write Nowseries by Marie Hablitzel and Kim Stitzer
- Trace and Paint Nature by Nicki Traikos
Books for learning more about narration
- Know and Tell: The Art of Narration by Karen Glass
- Narration Retelling: Charlotte Mason’s Living Method of Learning by Shannon Whiteside
- How to Teach Nature Journaling by John Muir Laws and Emilie Lygren
How we store our notebooking pages

Each of my children has several 3-ring binders organized by subject, including Bible, history, science, and other subjects we regularly notebook. The binders are filled with clear page protectors so we can safely store completed notebook pages.
Once a notebooking page is complete and any paint or glue is fully dry, I slip it into the appropriate subject binder. We place pages back-to-back in each page protector so we can use both sides. This makes it easy for the children to look through their work without damaging the pages and keeps everything organized by subject.
I do not start new notebooks at the beginning of each school year. The children continue adding pages to the same subject binders from year to year. Because the notebooks span several years, they allow us to see how each child’s ideas, handwriting, artwork, and ability to communicate what they have learned have developed over time.
Over the years, we have tossed plenty of completed workbooks, worksheets, and craft projects. I simply cannot keep every piece of paper my children create. But their notebooking pages are different. They are keepsakes: beautiful records of what captured their attention, how they expressed their ideas, and how their skills grew over time. When we look back through them, we are not only remembering what they learned; we are remembering the books we read, the places we explored, the conversations we shared, and the season of homeschooling in which each page was created. We see large drawings become detailed illustrations, copied sentences become thoughtful narrations, and shared lessons grow into independent research. Together, the pages tell the story of each child’s education.
Our simple notebooking rhythm

Notebooking can look elaborate when you see a finished page, but the process itself is usually very simple. This is the basic rhythm I use with almost any subject:
- Begin with something worth telling. Read a living book, study a Bible passage or poem, observe something outdoors, watch a demonstration, or talk through an idea together.
- Choose the focus of the page. A younger child may choose one fact and one picture; an older child may decide to explain a larger idea, make a comparison, or organize several details. This may mean the older children do further research at this point.
- Ask for narration first. Before anyone reaches for supplies, I invite the children to tell what they remember, what surprised them, or what they think matters most.
- Add writing and visuals. I offer the level of help each child needs, whether that means writing down dictated words, putting a sentence on the whiteboard to copy, helping plan a paragraph, or finding a map or reference image.
- Finish without overworking it. The child may add labels, color, an outline with an ultra-fine marker, or a light watercolor wash.
How often do we notebook?

How often we notebook depends on the child’s age and the type of page they are creating. A younger child completing a simple drawing, a few labels, or a short narration may make one or two notebooking pages each week. We typically work on the same page for multiple days until completed. An older child’s page may involve independent research, multiple written drafts, editing, detailed illustrations, and several days of work, so they may complete only two pages in a month. I am less concerned with how many pages they finish than I am with giving them the time to thoughtfully process what they are learning and create work they are proud to keep.
More frequently asked questions about notebooking
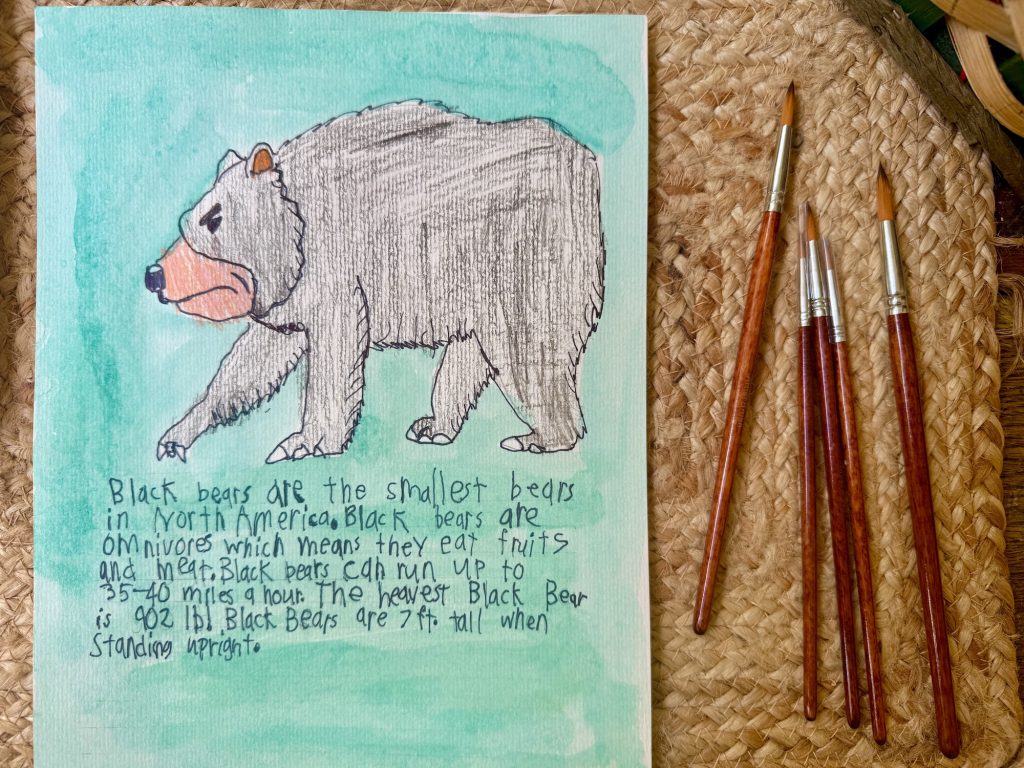
Here are more details to consider if you are beginning the practice of notebooking in your homeschool.
- What is the difference between a notebooking page and a traditional worksheet? A traditional worksheet has questions and exercises for a child to go through, and often has an answer key. A notebooking exercise is an open-ended writing assignment where children summarize what they learned from a reading passage or lesson.
- What supplies do you need for notebooking? Notebooking can be done in a variety of ways, but we love to use watercolor paper, watercolor paints, pencils, and pens to make beautiful notebooking pages.
- At what age or grade should a child start notebooking? This practice can be done from preschool through high school, adapting the practice to your child’s learning level. Very young children can start by telling you what they learned and drawing a picture, and you can write down what they say by their drawing.
- Should I add notebooking if my children are already doing oral narrations? Notebooking is a writing practice that can be done in conjunction with oral narrations.
- How often a week should a child do notebooking? Notebooking can easily be done daily for multiple subjects or for selected studies only.
- How many subjects should you do notebooking for? Notebooking pairs well with literature, language arts, nature study, science, history, and Bible.
- How long should a notebooking session take? Notebooking can take anywhere from 30 minutes to hours over multiple days depending on ages and how in-depth your children go with it.
- How do you store your notebooking pages? Notebooking pages can be stored in page protectors in a 3-ring binder or in a folder. It is fun to have them in a binder you can flip through later to see all your child has learned. Others like to use a sketch book.
- Can you do notebooking for little children who can’t read or write yet? Young children who are still learning to read and write can still participate in notebooking by saying what they learn and drawing pictures to go along with it. You can write down what they say.
- How do I help a child who is struggling with notebooking? If a child is struggling with an assignment, sometimes it is helpful to pause and go back to it later, or just focus on either the drawing or writing aspect of the assignment. It is also OK to keep it simple and go more in-depth on a notebooking assignment they are more engaged with. You can also encourage children by showing interest in their thoughts and perspective on a subject you learn together, even if they express frustration or boredom with the topic.
- Should I correct spelling or messy handwriting on notebooking pages? For younger children we recommended that they do first drafts in pencil in order to correct any errors in spelling or grammar. Older children can do multiple drafts on separate paper before writing on their notebook page.
- Do you grade notebooking pages? I do not grade notebooking pages, but for older children I do check for spelling, grammar, and handwriting.
- How do I encourage creativity without my child getting frustrated or upset over their drawing skills? The practice of notebooking is as much about the process of thinking through and repeating what they have learned as it is about the final result. If a child is struggling with the art aspect, use a drawing tutorial, or cut out pictures they can glue to the page.
- What do I do if my child makes a mistake and wants to start over? If a child is prone to wanting to start from scratch, you could encourage them to use pencil, which is more forgiving if they want to change something. They could also do a first draft and then do a second draft later once they have settled on the details. Finally, you can praise a child’s effort regardless of their results by talking about how hard they are working or how creative their ideas are, regardless of the final result.
- Do children need to finish a notebooking page in one sitting? Children can continue working on notebooking pages over several days, depending on how in depth you go. One day they can do research, start their artwork, write a first draft, and then come back to it another day.
How to begin notebooking in your homeschool

If you are new to notebooking, you do not need to plan an entire notebook or gather a cart full of art supplies. Begin with the lesson you are already teaching. When you finish reading, observing, or discussing, hand each child a blank page and ask, “What would you like to remember?”
Let the youngest child answer with a picture and a sentence. Let an older child decide whether a map, narration, diagram, list, or combination of those would communicate the idea best. Offer help, but leave room for the page to belong to them.
Notebooking has remained part of our homeschool because it bends with our family. At one age, a child’s understanding may appear as a crayon drawing with words dictated to me. A few years later, it may become a careful map and a paragraph connecting several ideas. Both pages matter. Both show a child paying attention and learning to tell what they know.
Do you use notebooking in your homeschool? I would love to hear what it looks like around your table and which subjects most naturally make their way onto your children’s pages.